Silicone seals rarely fail because the rubber wore out. They fail because of what collects on them: a shower joint that darkens along its edge, a gasket that keeps the smell of last night’s stew. Replacing the part is usually harder than cleaning it.
The reliable order is to remove the food source first and attack the organism second. Wash with warm water and mild dish soap, apply baking soda paste, hydrogen peroxide or a short vinegar soak, let it dwell while wet, agitate with a soft brush, rinse fully and dry completely. Silicone does not feed mold and does not absorb water like a sponge, so growth sits in surface residue and in water trapped along the joint. Discoloration that survives this process is usually pigment, not living growth.
What separates a seal that stays clean for years from one that discolors within months comes down to material, geometry and moisture.
Why Silicone Seals Grow Mold, Hold Odor and Stain
Silicone rubber offers mold nothing to eat: its backbone is a silicon oxygen chain, not a carbon chain fungi can break down, so colonization depends on what sits on the surface and what stays wet. Soap scum, skin cells and cooking fat supply the nutrients, and a joint that never dries supplies the water.
Two variables decide the speed: the grade, finish and geometry of the part, and how it is cleaned and dried afterwards. A fabricante de sellos de silicona controls the first, the user controls the second.
Mold Grows on Residue, Not on the Rubber
Describing silicone as porous enough for mold to live inside it is misleading. Cured silicone is a dense elastomer and not a nutrient, so soil builds up in surface texture, in scratches from abrasive pads, along cut edges and in the gap where the seal meets tile. The dark line then follows the joint rather than the bulk, which is why contamination behind the bead is unreachable.
Mold resistance is tested rather than inherent. Sanitary grades carry fungistatic additives, and ISO 846 separates the claims: Method A asks whether a material supports fungal attack without external nutrients, Method B whether it inhibits growth where nutrients exist. A pass is a laboratory result, not a promise that a part never discolors.
Odor Is Absorbed and Then Held
Silicone absorbs lipophilic compounds, so a gasket used with spiced food keeps a smell after its surface is clean while one used only with water does not. Heat increases diffusion, which is why a very hot wash can carry odor deeper before it is rinsed away. On a fixed joint the cause is usually biofilm in the gap and stagnant water behind the bead.
Stain, Residue or Living Growth
Persistent black or pink discoloration may result from embedded stains, residual mold contamination, or material aging. Appearance alone cannot confirm whether viable mold remains.
| What you observe | Most likely cause | What it means |
| Color lifts onto a cloth with soapy water | Surface residue or fresh biofilm | Clean and dry; no material issue |
| Lightens with an oxidizing agent but returns | Growth at a persistent moisture source | Fix ventilation, drainage or the leak |
| Even color change, no regrowth after drying | Pigment in the rubber, or aging | Cosmetic; replace only for appearance |
| Dark line at the bond line | Contamination behind the seal | Not cleanable; reseal or replace |
The Best Cleaning Agents for Silicone Seals
Start with warm water and mild dish soap: most seal problems are residue problems, and detergent lifts residue without attacking the elastomer. Move to baking soda for odor and light staining, hydrogen peroxide for pigment, vinegar for mineral scale, and reserve bleach for genuine disinfection.
| Agent | Ideal para | Typical dwell | Main limitation |
| Mild dish soap, warm water | Residue, soap scum, food film | 1 to 2 minutes | Needs agitation on textured parts |
| Baking soda paste | Odor, light staining, gentle abrasion | 15 to 30 minutes | White residue lodges in crevices |
| 3% hydrogen peroxide | Pigment on white or light silicone | 30 to 60 minutes | Can lighten dyed silicone; test first |
| White vinegar, 5% | Mineral scale, light surface biofilm | 15 to 60 minutes | Attacks stone and some metals nearby |
| Diluted chlorine bleach | Disinfection after mold removal | As stated on the label | Not routine; incompatible with many substrates |
Mild Dish Soap and Warm Water Come First
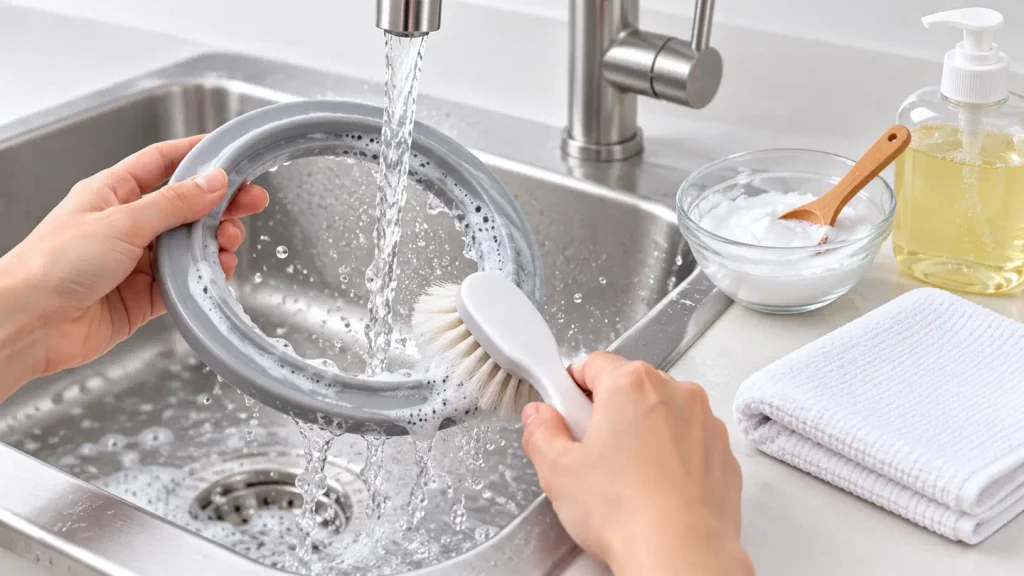
Detergent removes the film mold feeds on, leaves nothing aggressive on a food-contact part and works on every silicone grade. Warm rather than hot water is better, since heat drives absorbed odor deeper. Soap, a soft brush, a full rinse and a full dry is often the entire job on a removable gasket.
Baking Soda, Peroxide and Vinegar
Baking soda lifts film as a mild abrasive and absorbs odor as an alkaline salt. A paste of three parts soda to one part water, left for fifteen to thirty minutes, handles light staining and persistent smell; rinse well, since dried paste leaves a white haze.
Hydrogen peroxide at 3% is the best household option for pigment on white and translucent silicone, because it oxidizes the pigments in food dyes and mold metabolites. It also bleaches, so test dyed parts, and never mix it with vinegar, which produces peracetic acid.
White vinegar dissolves hard water scale, which matters because mineral deposits roughen a surface and give new growth an anchor. It is not a sterilant, and it should not contact marble, travertine, grout or plated fittings.
Chlorine Bleach and Bleach Gels, With Limits
Bleach disinfects effectively when correctly diluted and given the label contact time, and it lifts the darkening that makes a joint look unclean. It is a poor default: EPA mold guidance treats moisture control and physical removal as the durable solution, because bleach does not reach growth behind a bead. Never mix it with vinegar, ammonia or any other cleaner, since the reaction releases chlorine gas. Dilution figures for household disinfection are written for floors and counters, not for a seal on a food-contact lid, and thickened gels need confirming against both seal and substrate before use.
What to Keep Off a Seal
Abrasive pads scratch silicone, and every scratch collects residue a brush cannot reach. Acetone, mineral spirits and paint thinners swell the elastomer and attack the adhesive bond at the joint edge, while drain cleaners and high pressure steam degrade the rubber or lift a sound bead. Prolonged alcohol soaks are a poor routine choice, even though a brief wipe is standard before bonding. Silicone resistance data confirms a chemical before it touches a seal, and explains why a solvent harmless to the rubber can still destroy the joint.
How to Clean Mold from Silicone Seals Step by Step
Clean a removable gasket at the sink and a fixed bead in place, and never soak or boil a sealant joint. For either, the sequence is the same: remove loose soil while dry, wash with detergent, apply the agent and let it dwell while wet, agitate with a soft brush, rinse completely and dry fully.
The two should not be treated as one. A removable part is a molded component that can be lifted out, inspected on both faces and dried on a rack. A fixed sealant is a cured bead with a hidden face no cleaner can reach, which is why a comparison of silicone seal strips, gaskets and O-rings treats them as separate families. Immersion and oven drying belong to the first category only.
- Identify the part type and remove the part if it is removable.
- Brush off loose residue while dry, so it does not become a paste that spreads.
- Wash with warm water and mild dish soap, working the grooves with a soft brush.
- Apply the agent and keep the surface wet for the full dwell time.
- Agitate with a soft nylon brush along the texture rather than across it.
- Rinse thoroughly, and rinse twice on anything that contacts food.
- Dry completely in moving air before storage or reassembly.
Rinsing and drying are the steps most often skipped and the two that decide whether a seal stays clean: detergent left in a groove attracts soil, and a part stored damp hands mold the conditions it needs.
Fixed Beads and the Paper Towel Method
A vertical bead will not hold a liquid agent long enough to work. Saturating a strip of paper towel, pressing it onto the bead and leaving it for the dwell time keeps the agent in contact instead of running down the wall. Keep bleach soaked towels away from plated fittings and natural stone, and remove the towel before it dries, because a dry towel stops working.
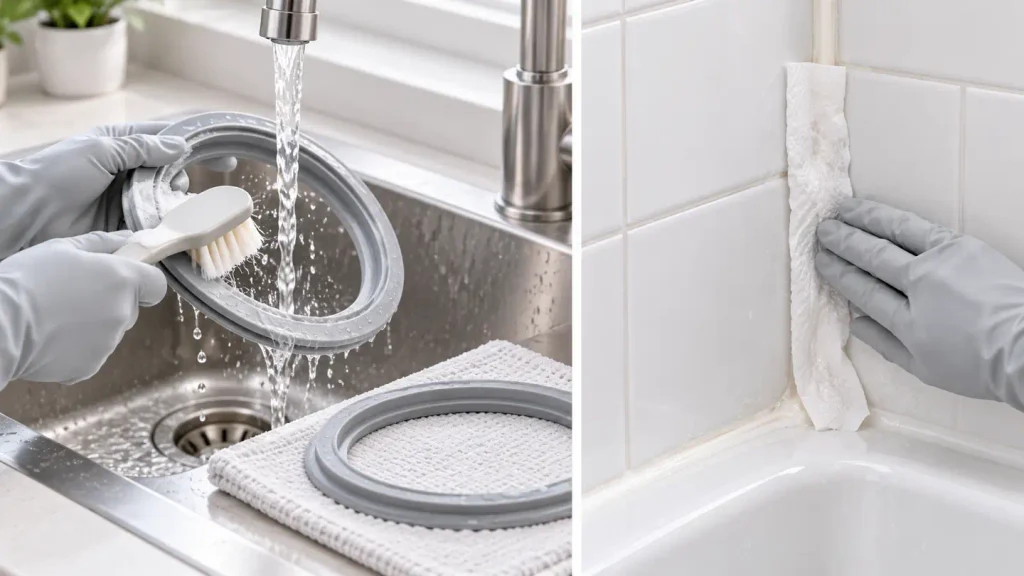
If the dark line shows through the bead rather than sitting on it, cleaning has nothing to act on and the joint needs to be cut out.
How to Remove Mold Smell and Odor from Silicone
Odor is separate from visible growth. Silicone absorbs oils and volatile compounds, so a gasket can smell of last week’s curry after its surface is clean. Remove the source with detergent, draw it out with a baking soda paste or vinegar soak, and dry in moving air. If the smell returns quickly on a fixed joint, moisture is trapped behind the bead.
Odor in Removable Seals, Gaskets and Rings
A pressure cooker’s food-grade silicone sealing ring is the classic case: aromatic spices, sulfur compounds from alliums and fatty broth at elevated temperature, all of which silicone absorbs readily. Three cycles usually clear it: a baking soda paste for half an hour, a soak in equal parts white vinegar and water for thirty to sixty minutes, then a full air dry in sunlight. Storing the ring loosely rather than compressed helps. If the smell survives three cycles, replacement is the practical answer.
Odor in a Fixed Sealant Joint
On a fixed joint, odor almost always indicates water where water should not be. Clean and dry the surface, run the extractor longer after each use, and check whether the smell persists once the area is genuinely dry. If it does, the source sits behind the bead, and the joint needs to come out, the substrate dried, and a new bead applied.
How to Remove Stains from Silicone Seals
Match the treatment to the stain, and accept that some discoloration is permanent. Yellow and brown films from cooking oils, rust transfer or aged sealant respond to detergent, baking soda and peroxide. Black marks left after mold cleaning are usually pigment diffused into the rubber that will not lift, and UV yellowing, chemical attack or heat damage change the material itself.
Yellow and Brown Stains
Yellowing on a cooking seal is normally oxidized fat and responds to a warm detergent wash and a baking soda paste. Brown or orange marks near metal fittings are usually rust transfer, which lifts with a mild acid such as vinegar if the substrate tolerates it. A translucent seal turned amber evenly, rather than in patches, has aged.
Black Stains That Remain After Mold Cleaning
A mark that lightens during treatment but never disappears has left pigment behind. Mold metabolites stain silicone, and the pigment diffuses into the elastomer rather than sitting on top of it. A hydrogen peroxide poultice can reduce it over several applications, and nothing removes it entirely, which is cosmetic rather than evidence of live contamination.
When Discoloration Is Permanent
Three changes are not cleanable: UV exposure yellows translucent and white silicone in the polymer itself, chemical attack leaves a dull or chalky surface, and sustained heat above the rating of the grade hardens and darkens the rubber. The part may still seal correctly, so the decision is whether appearance matters for the application.
When Cleaning Stops Working and the Seal Should Be Replaced
Replace the seal when it has stopped doing its job, not when it looks imperfect. Loss of adhesion, cracks, a hardened profile and contamination behind the bead are functional failures no cleaner reaches. Recurrence alone is not a verdict, because regrowth usually means moisture or trapped residue is still feeding it, and those conditions spoil a new seal just as quickly.
| Signal | How to check | Action |
| Loss of adhesion | Lift the edge with a fingernail at the bead end | Remove and reseal |
| Cracks or splits | Flex the part and inspect the inner radius | Replace |
| Hardening or flattening | Compare section thickness with an unused part | Replace |
| Contamination behind the bead | Look for a dark line through a translucent seal | Cut out and reseal |
Specifying a Seal That Stays Cleaner
Four decisions determine how well a part resists soiling: surface finish, because gloss holds less residue than matte; geometry, since narrow crevices and undrained channels trap water; compound choice, including whether a fungistatic additive suits the application; and cure system, which with compliance sets hard limits on where a part can be used.
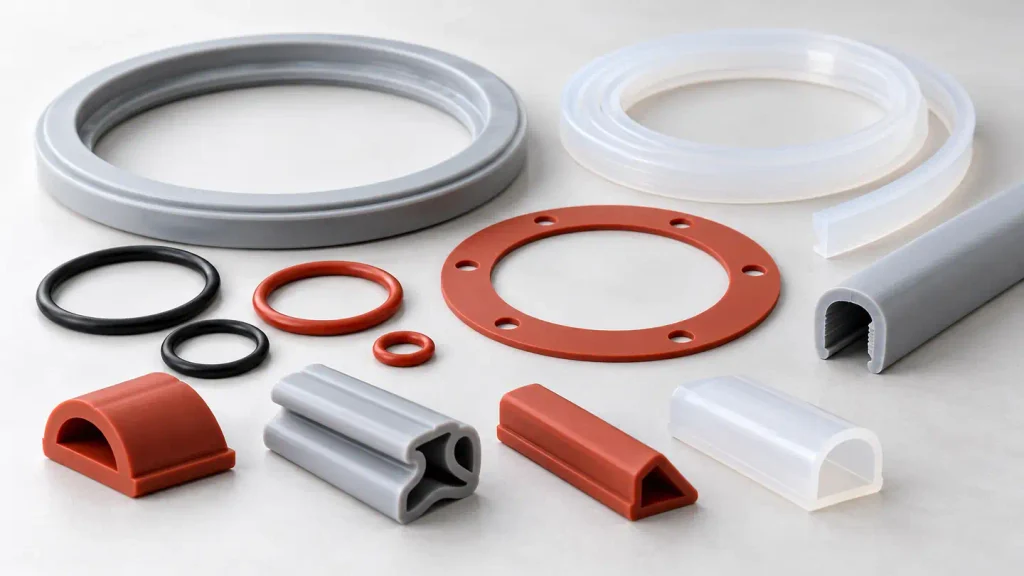
The durometer, tolerance and material options in this Guía de especificaciones de sellos de silicona are the practical starting point. Compliance is stated per application: a food-contact seal is evaluated under 21 CFR 177.2600, while a drinking water seal is evaluated against NSF/ANSI/CAN 61. A part qualified under one framework is not automatically qualified under the other.
Preventing Mold, Odor and Stains Between Cleanings
Dry the seal, not just the room. Most regrowth traces to water that stays in contact with the joint for hours, so airflow, drainage and a wipe after each use do more than any periodic deep clean.
Habits That Cost Nothing
Run the extractor for twenty minutes after a shower and leave the door open. Wipe the joint in the same routine. Rinse removable gaskets before residue dries and dry them on a rack, not in a closed drawer. Keep bar soap off a wet shelf, because soap residue feeds the film.
A Simple Schedule
| Interval | Task |
| After each use | Rinse and dry removable parts; wipe the fixed joint |
| Weekly | Detergent wash of the joint and gasket grooves |
| Monthly | Inspect the bond line for lifting or dark lines |
Preguntas frecuentes
Can silicone seals go in the dishwasher?
Only if the part is rated for it. Dishwasher detergent is alkaline and the drying cycle runs hot, which accelerates aging in some compounds and drives absorbed odor deeper. Hand washing and a full air dry is gentler and more predictable.
Does boiling water kill mold on silicone?
Boiling kills many vegetative cells but not every spore, and it does nothing to pigment already diffused into the rubber. It suits some all-silicone kitchen parts when the maker permits it, and never a fixed sealant joint, where heat and moisture at the bond line make the problem worse.
Does WD-40 remove mold from silicone?
No. It is a multi-use penetrating lubricant formulated for lubrication, rust prevention, moisture displacement and loosening light soil, not a mold remover, disinfectant or cleaner for elastomer seals. It leaves an oily film that holds soil against the surface, and residue at a joint interferes with adhesion if the seal is later replaced.